None. Service Experience insights user credentials are not required for Mobile agent download and activation.
A variety of agent software is provided to support deployment in heterogeneous network environments. Mobile agents that run as native applications on Windows and macOS are easy to deploy and provide metrics from the end user’s PC through the network to the monitored service.
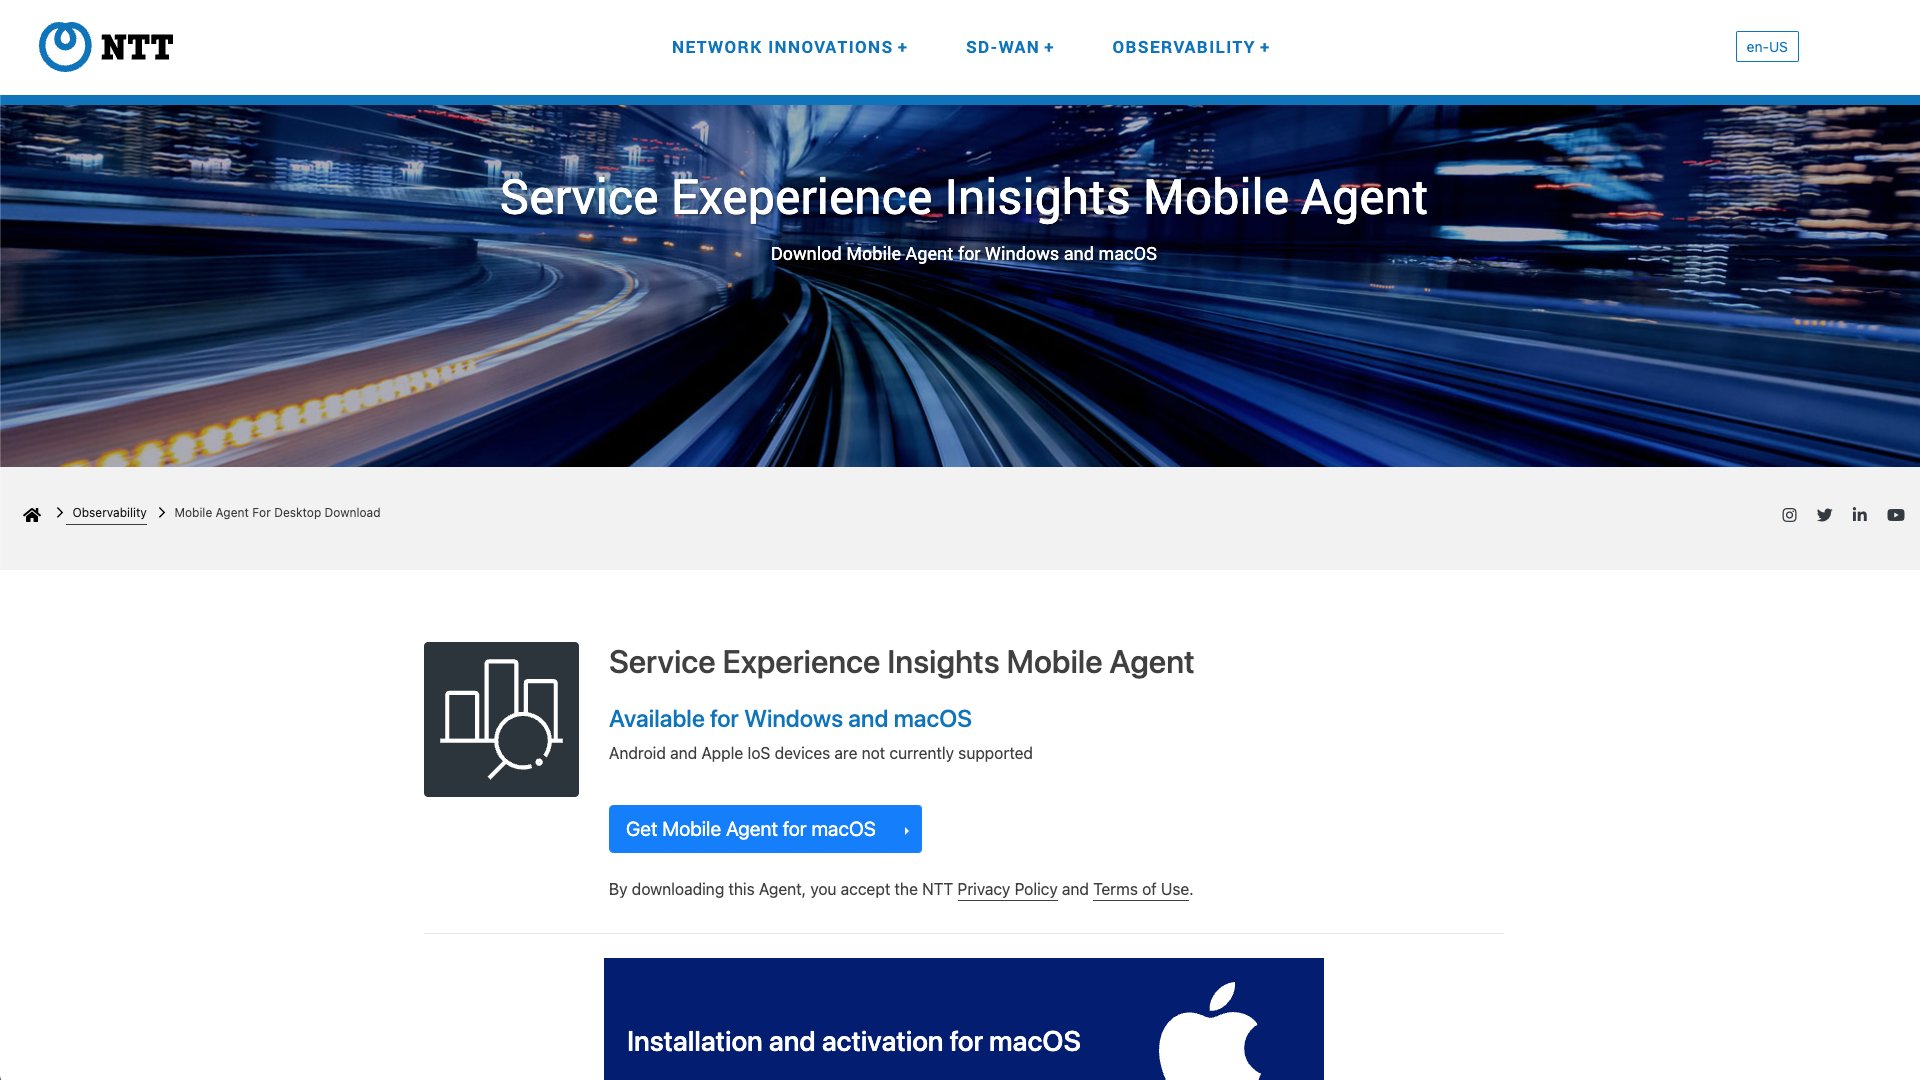
The Mobile Agent for Desktop can be installed and activated on Windows and macOS environments remotely through a mobile device manager (MDM) like Microsoft Intune JAMF or downloaded and self-installed.
Once downloaded and installed, mobile agents are activated by a single-use individual token that is automatically emailed to the installer or provided through their IT department.
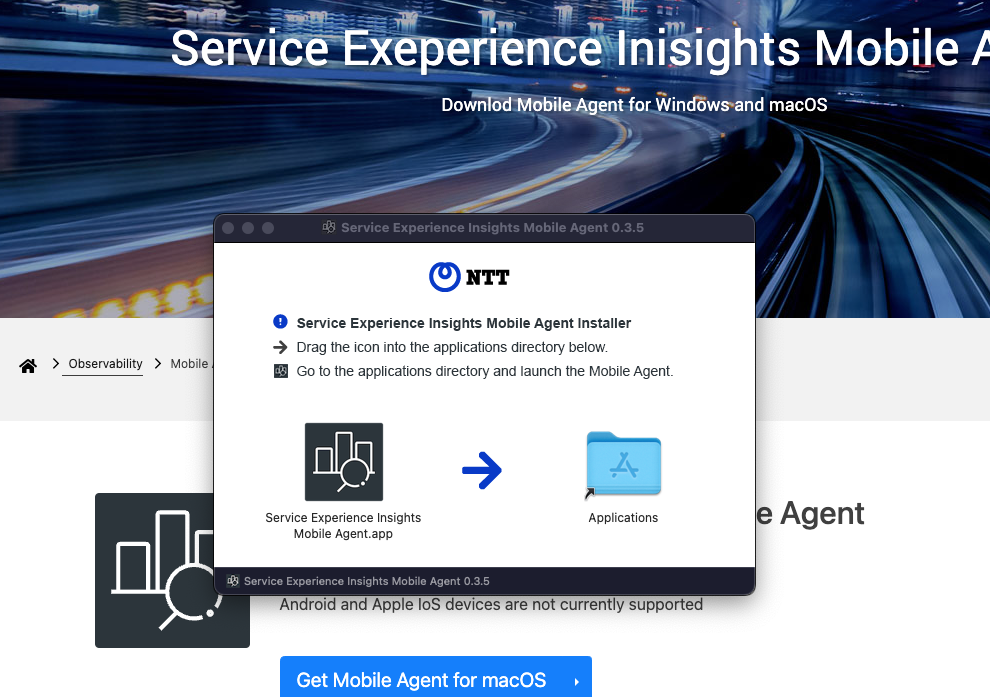
Following are step-by-step instructions for self-installing mobile agents to Windows and MacOS desktops.
Learn more about agents in the Agents Overview article.
Windows or macOS PC
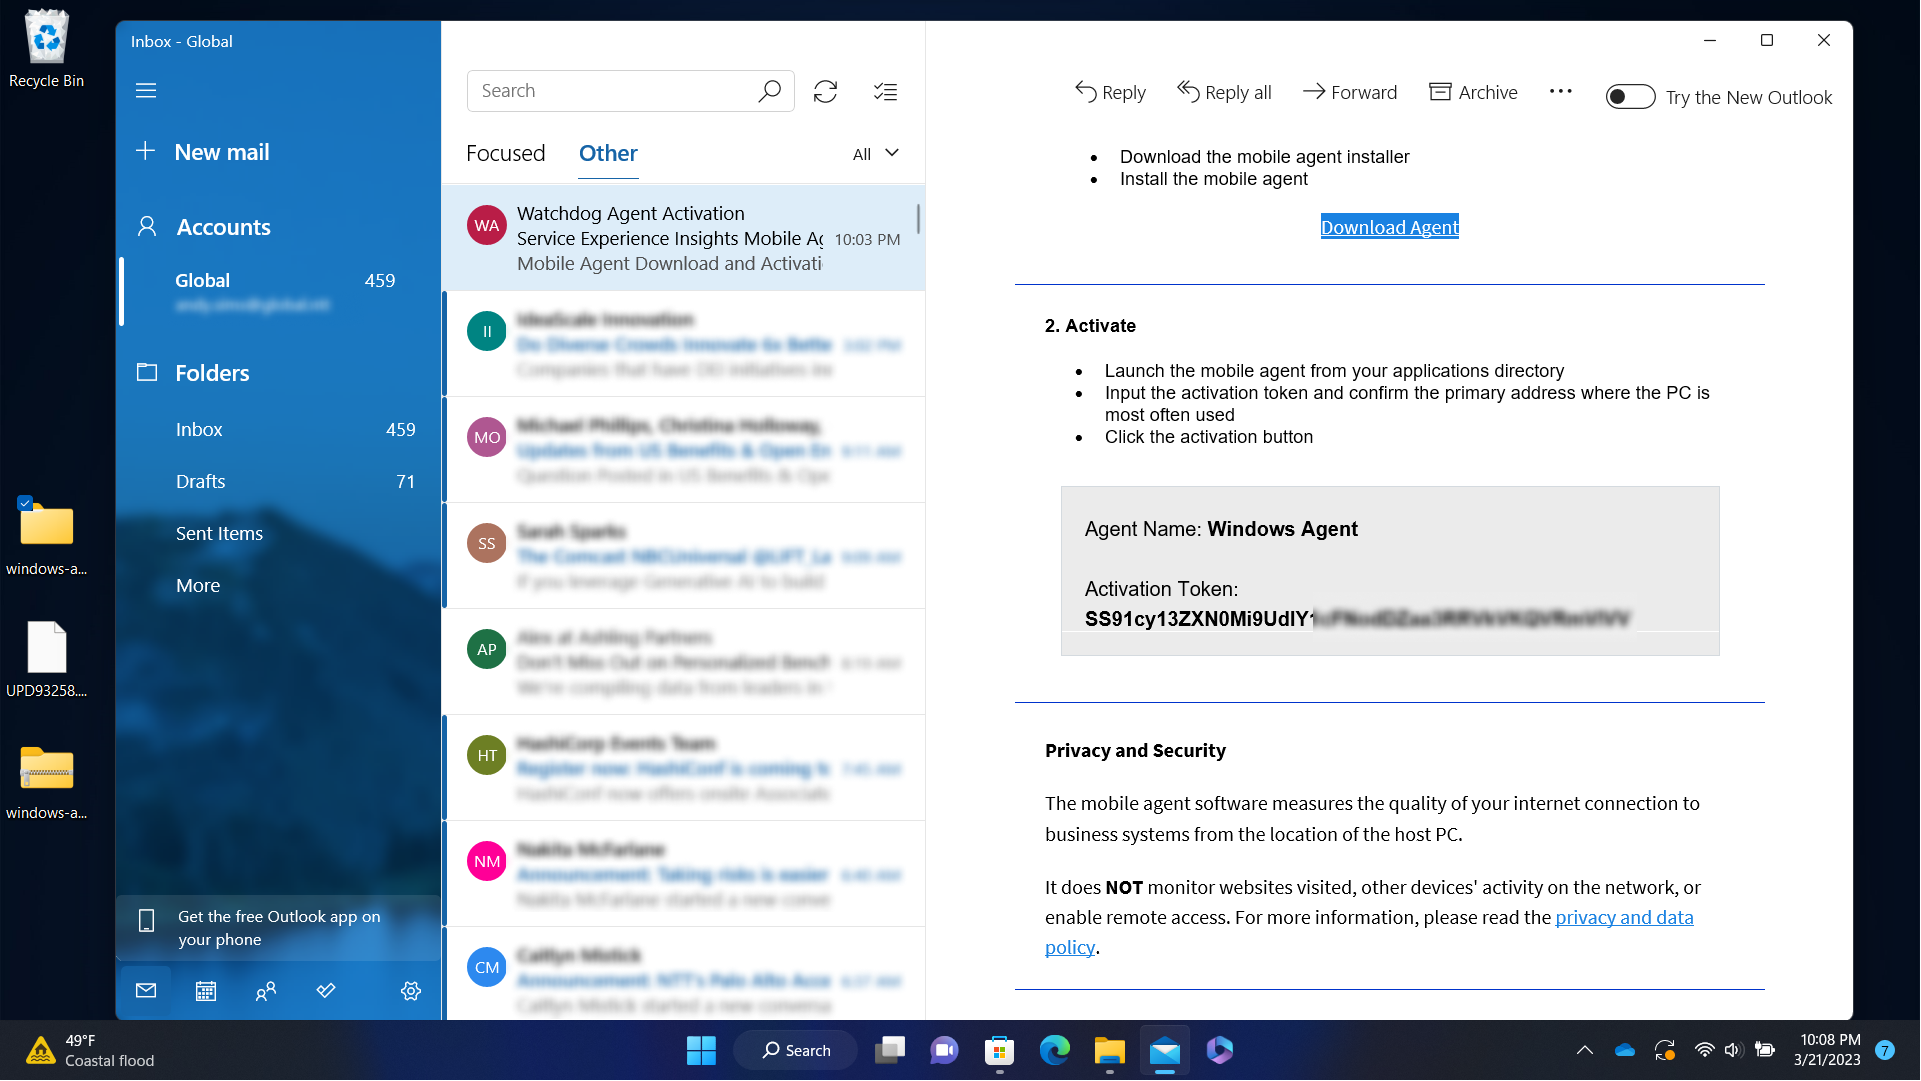
Step 1: Receive the Service Experience Insights Agent Activation email
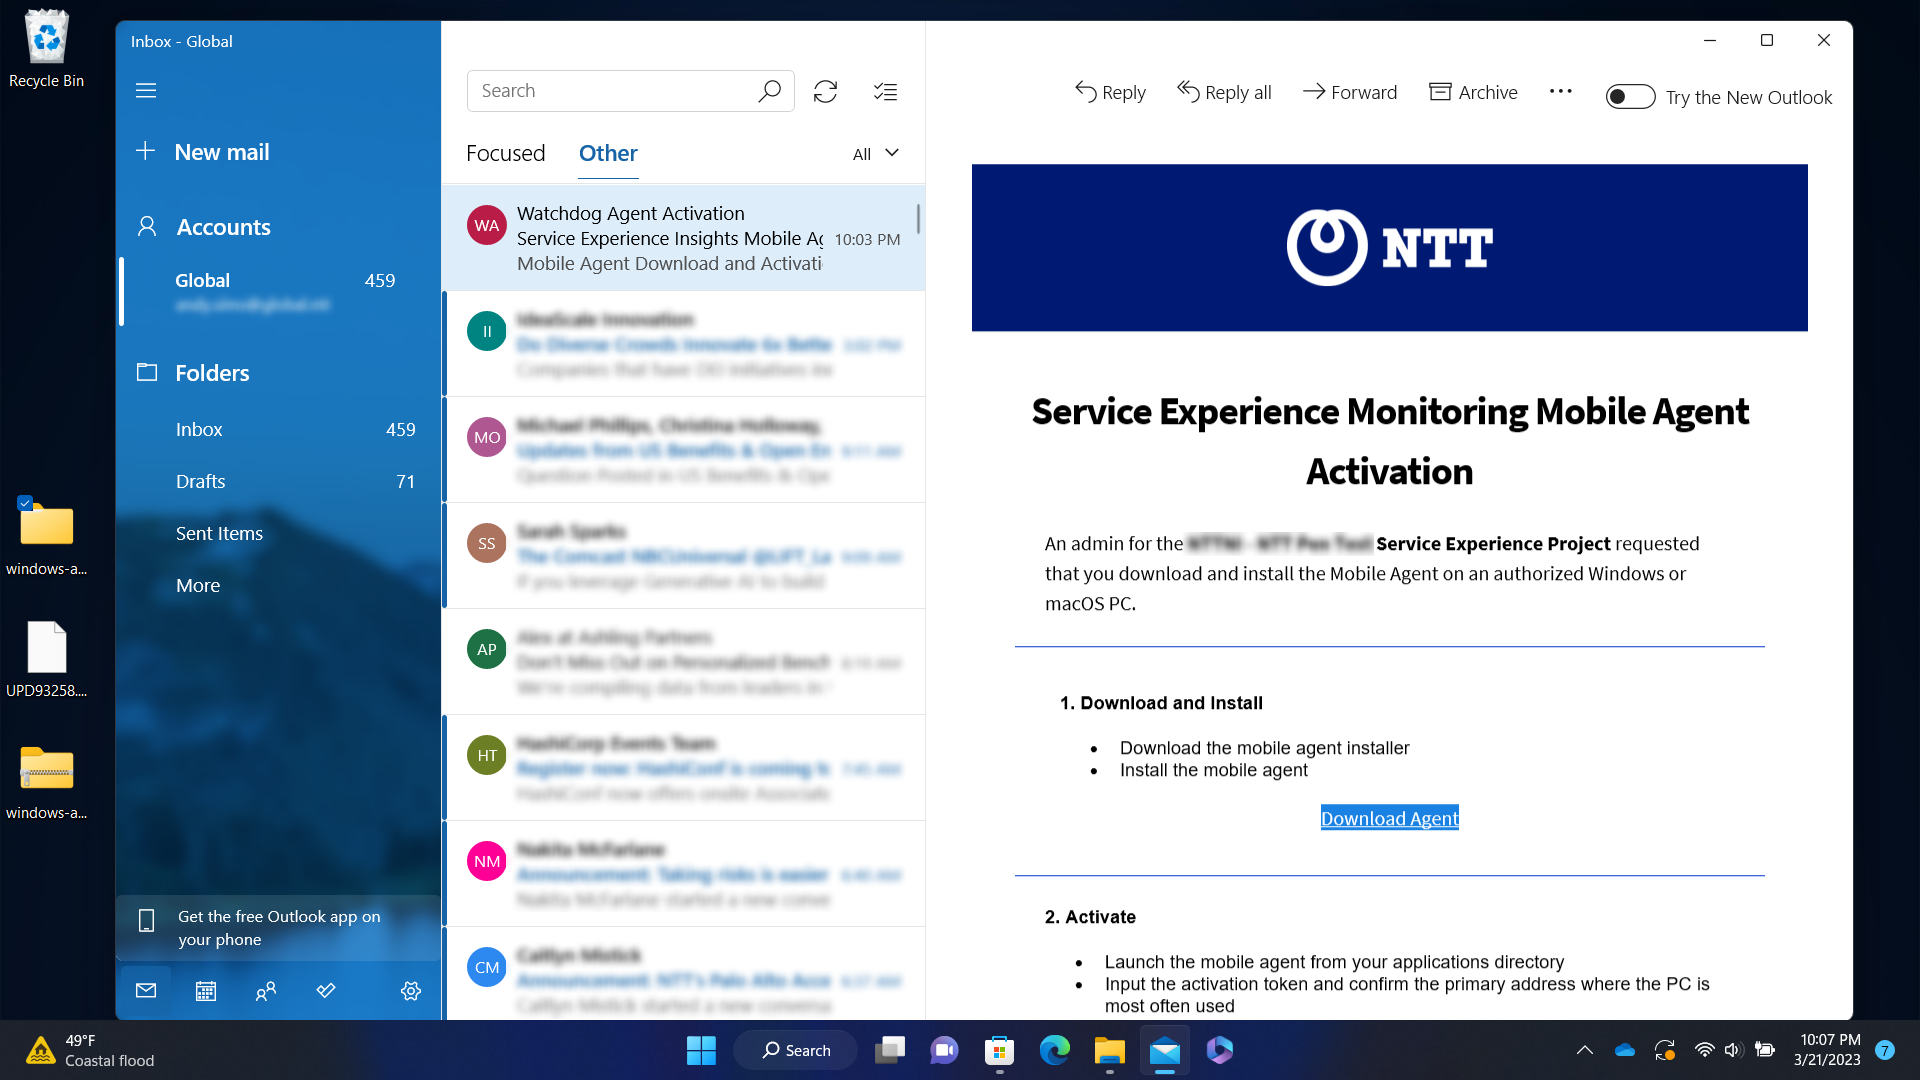
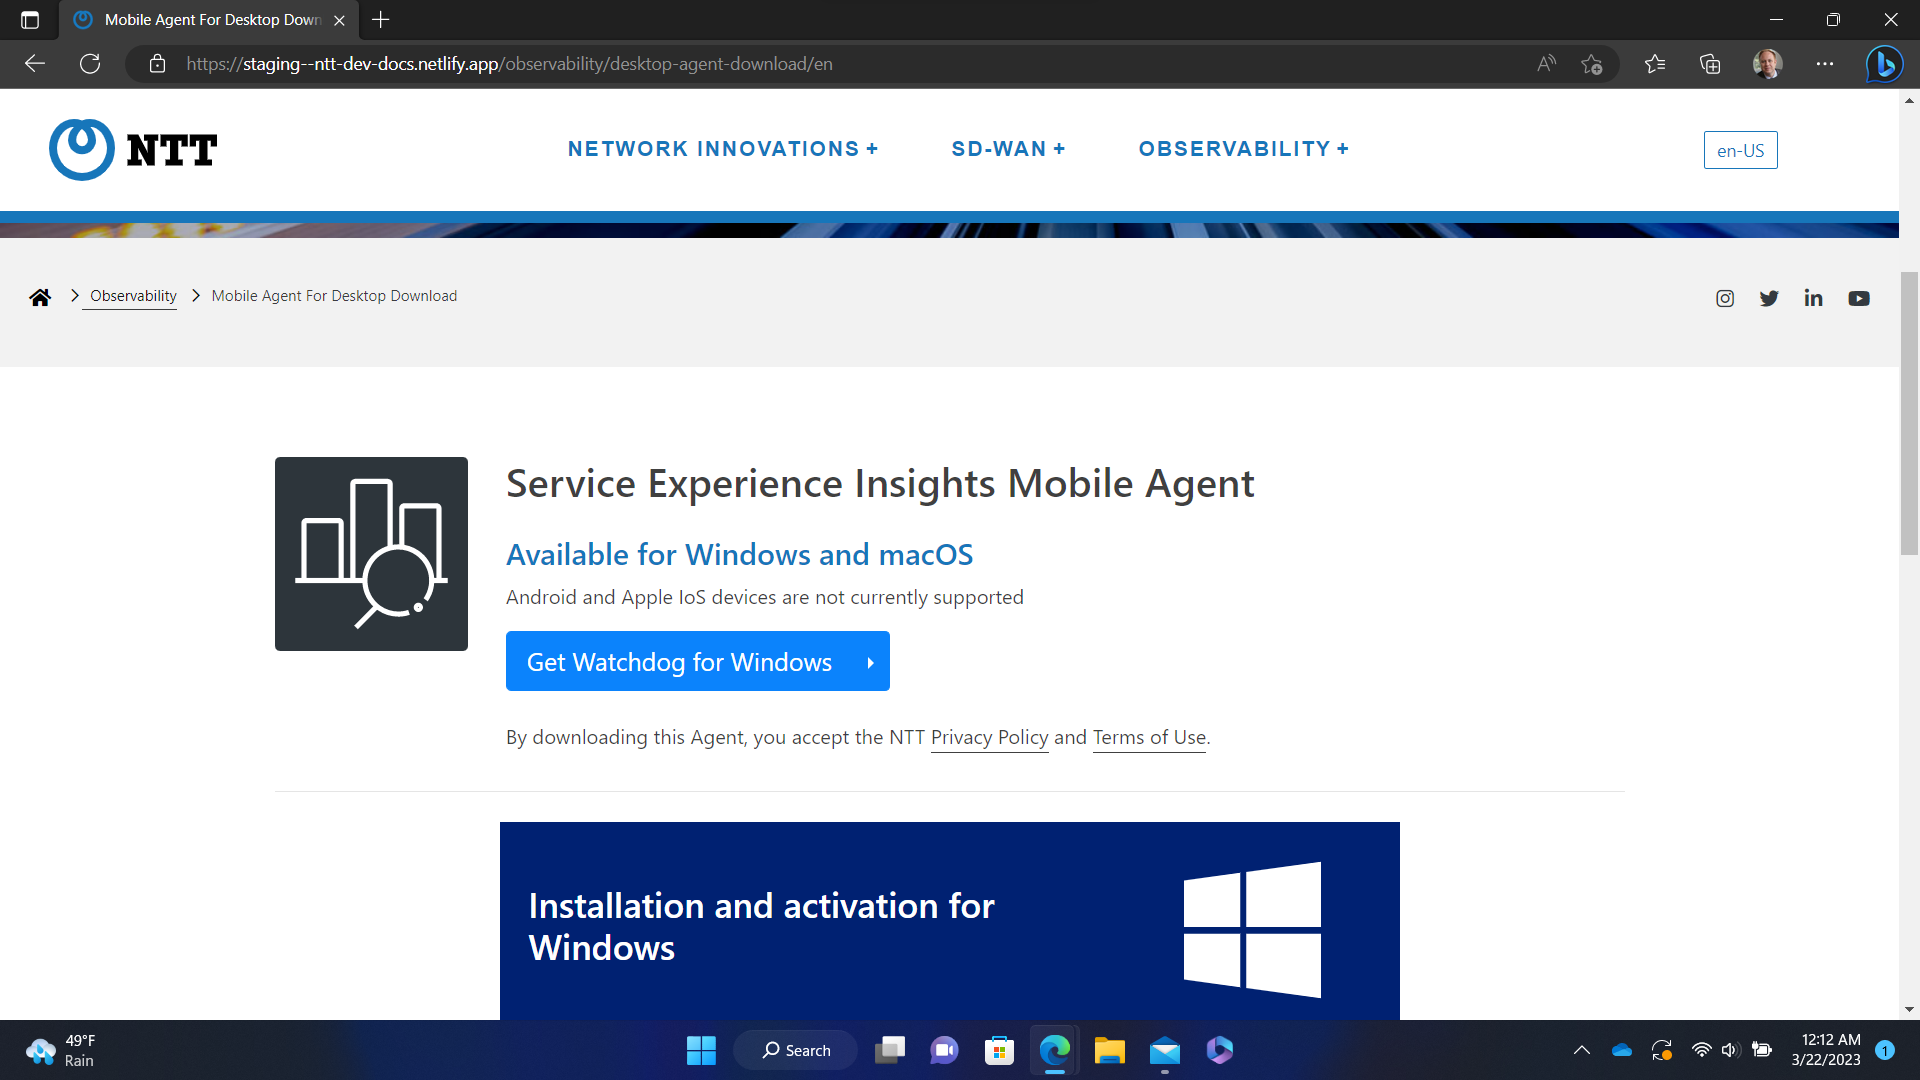
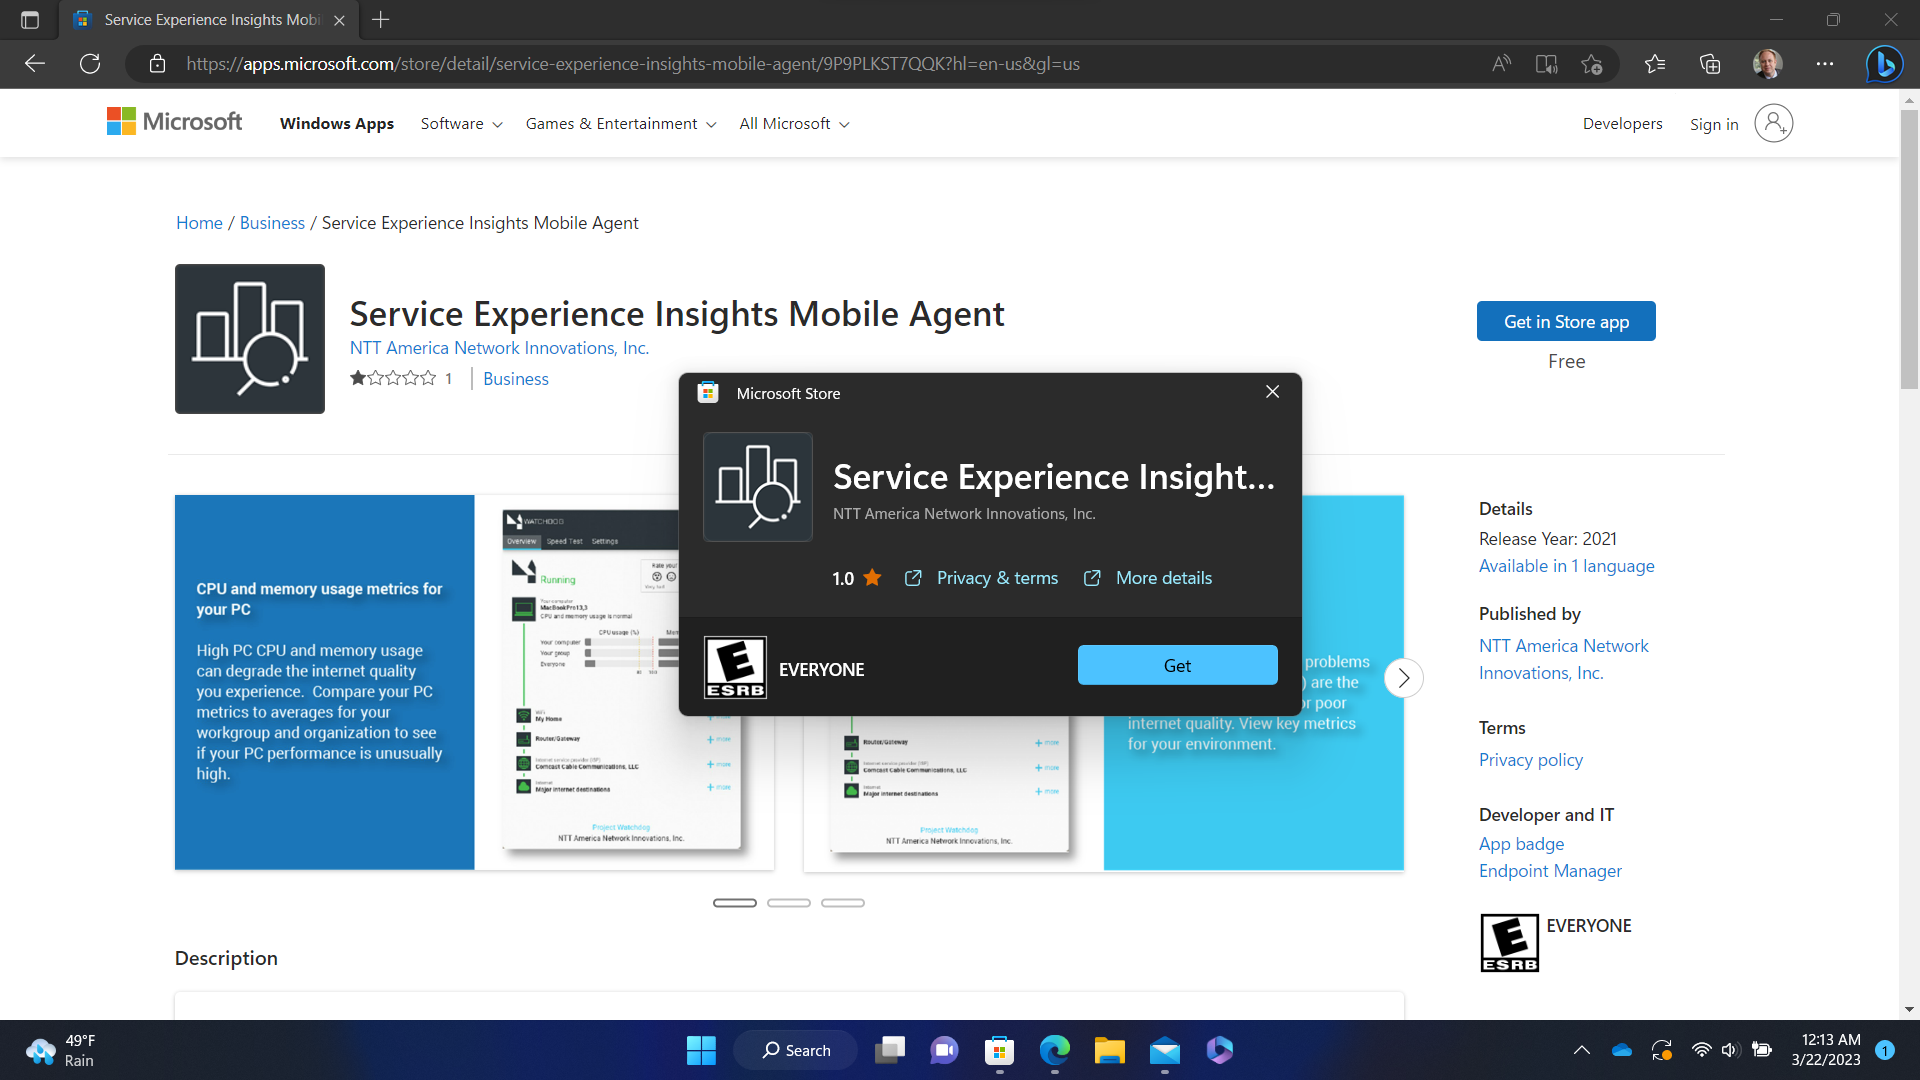
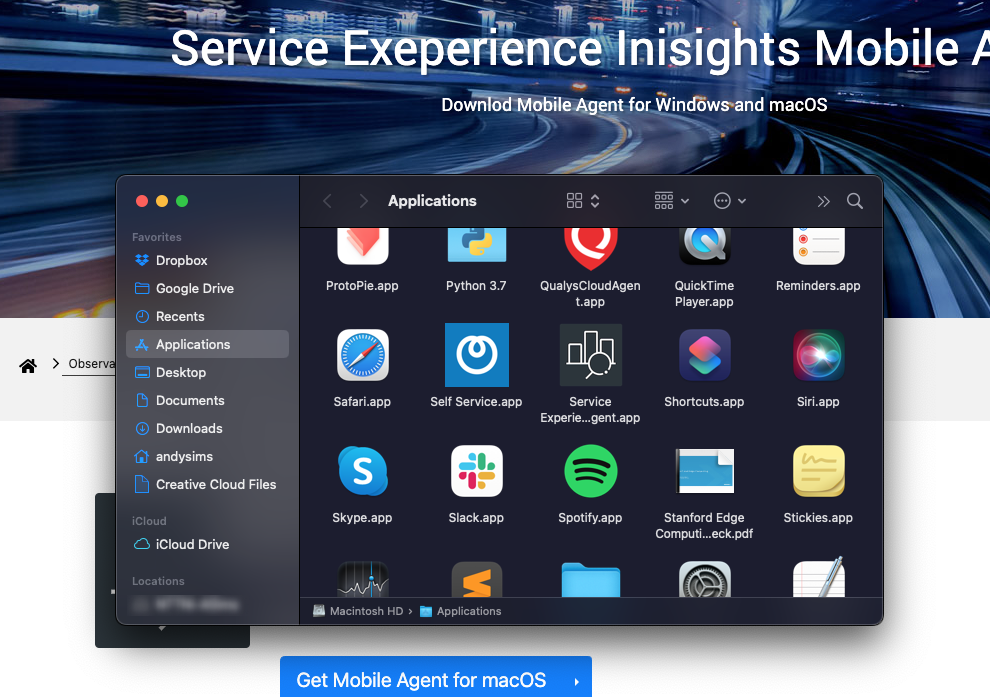
Step 2: Click the Download Agent link
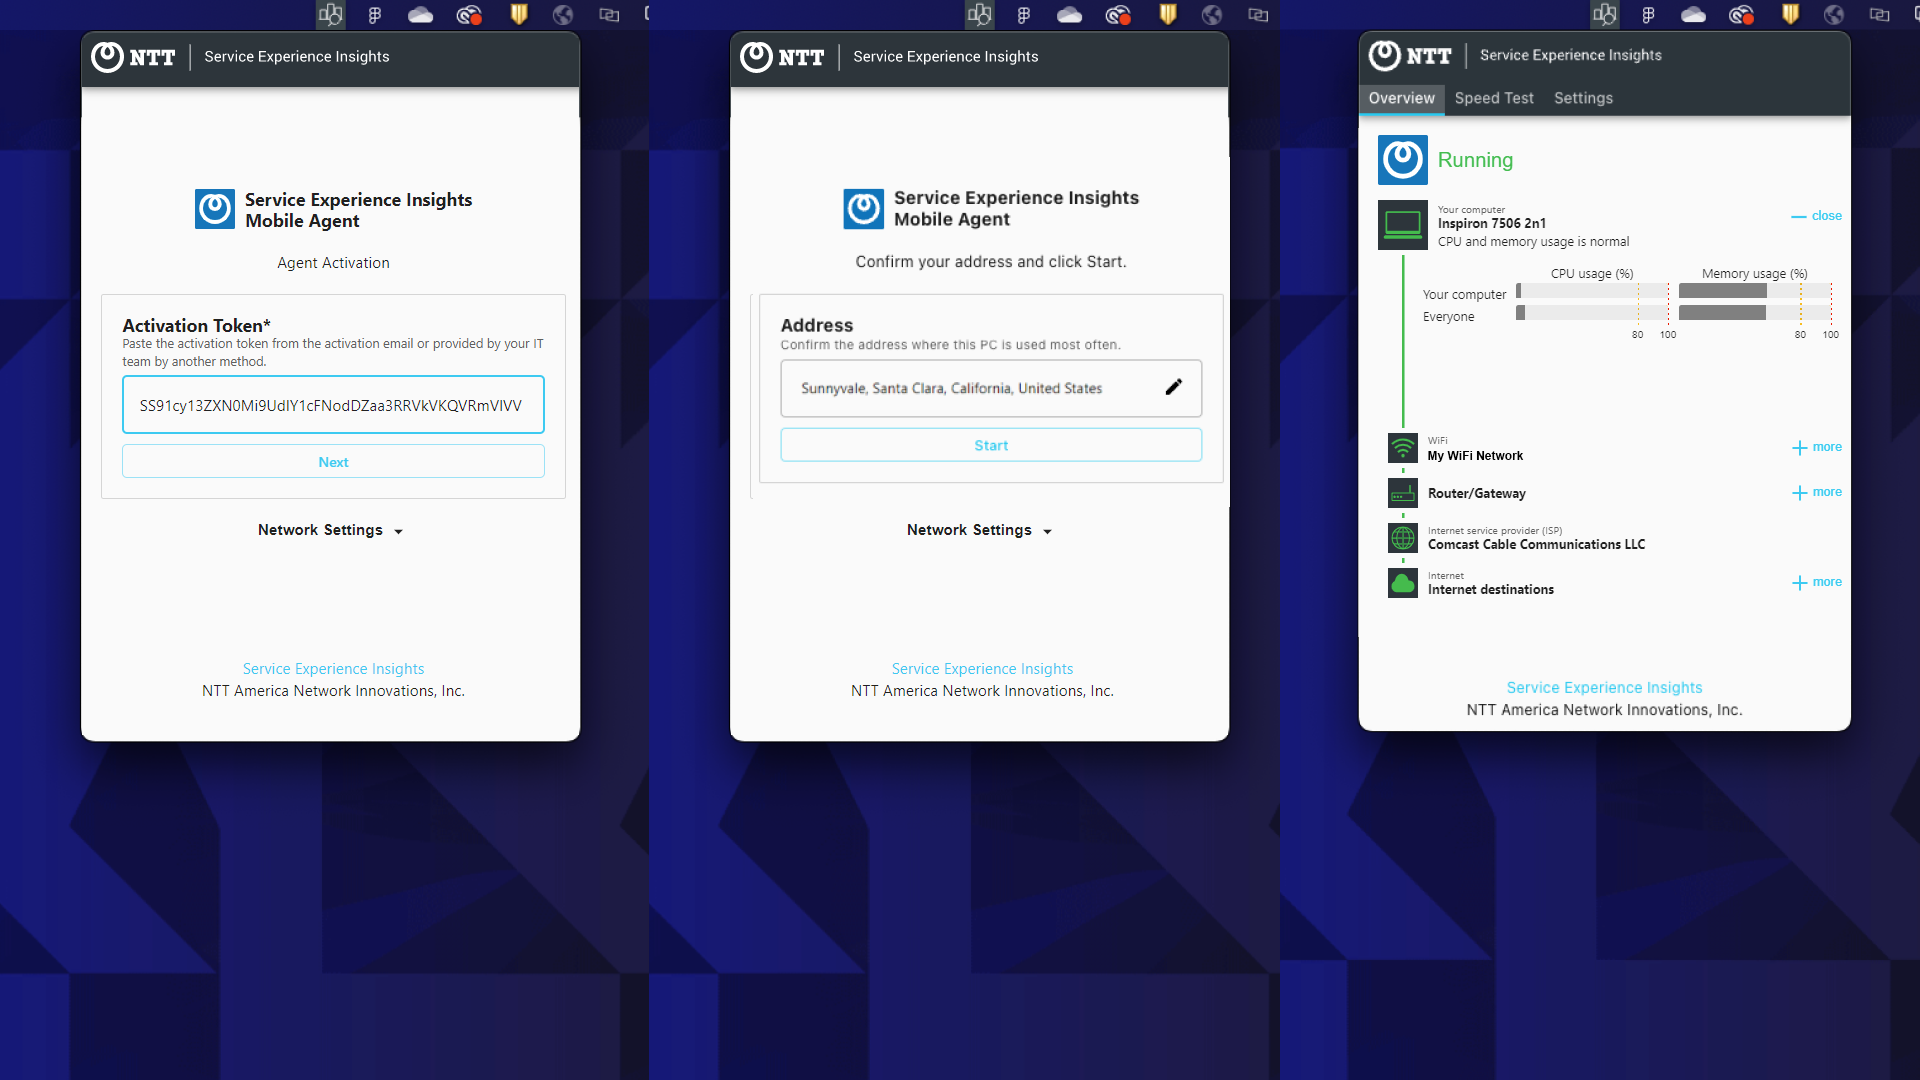
Step 3: Activation Token
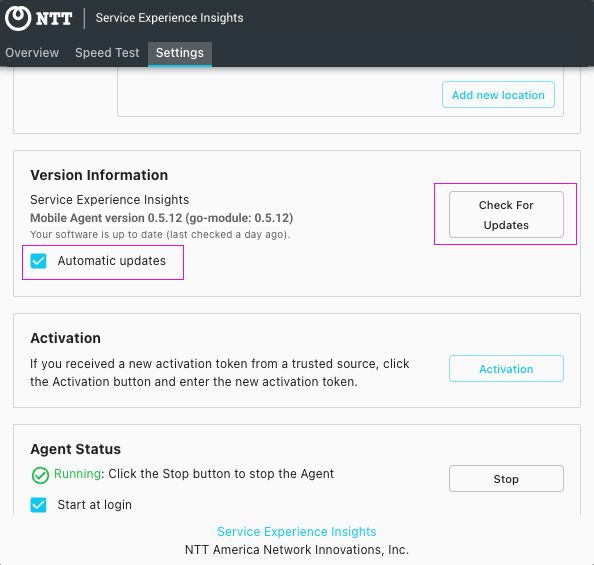
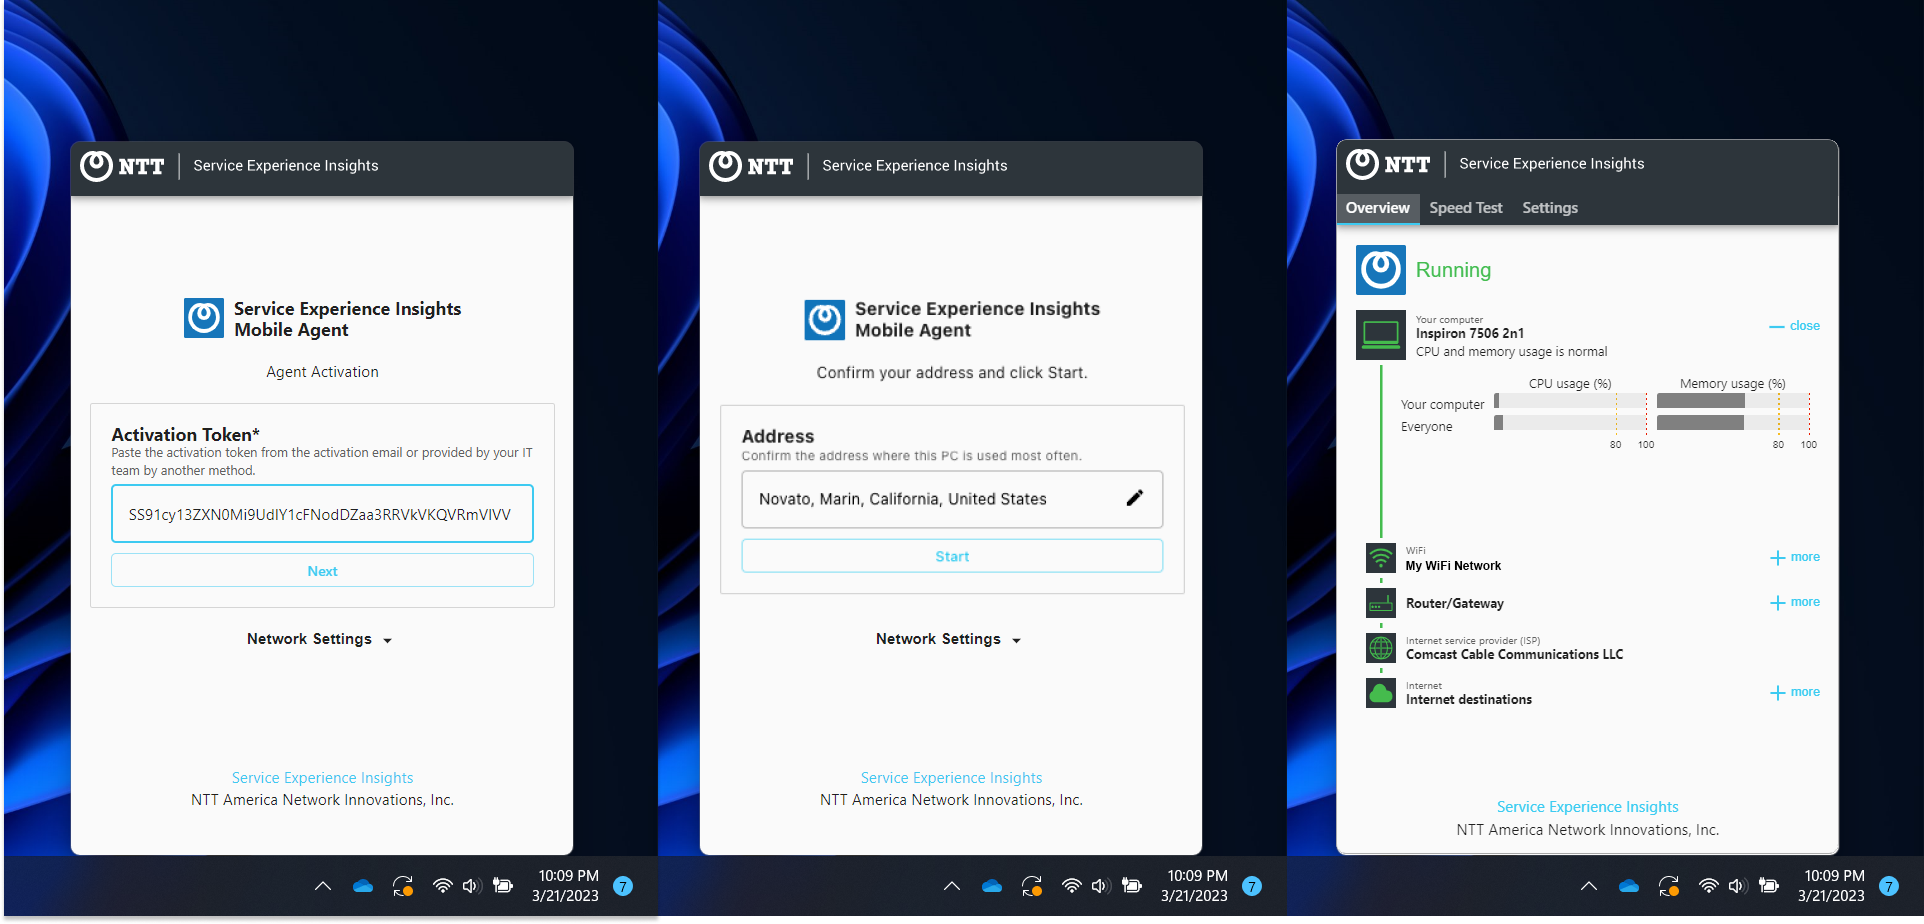
Step 4: Activate the agent
Step 1: Receive the Service Experience Insights Agent Activation email
Step 2: Click the Download Agent link
Step 3: Activation Token
Step 4: Activate the agent
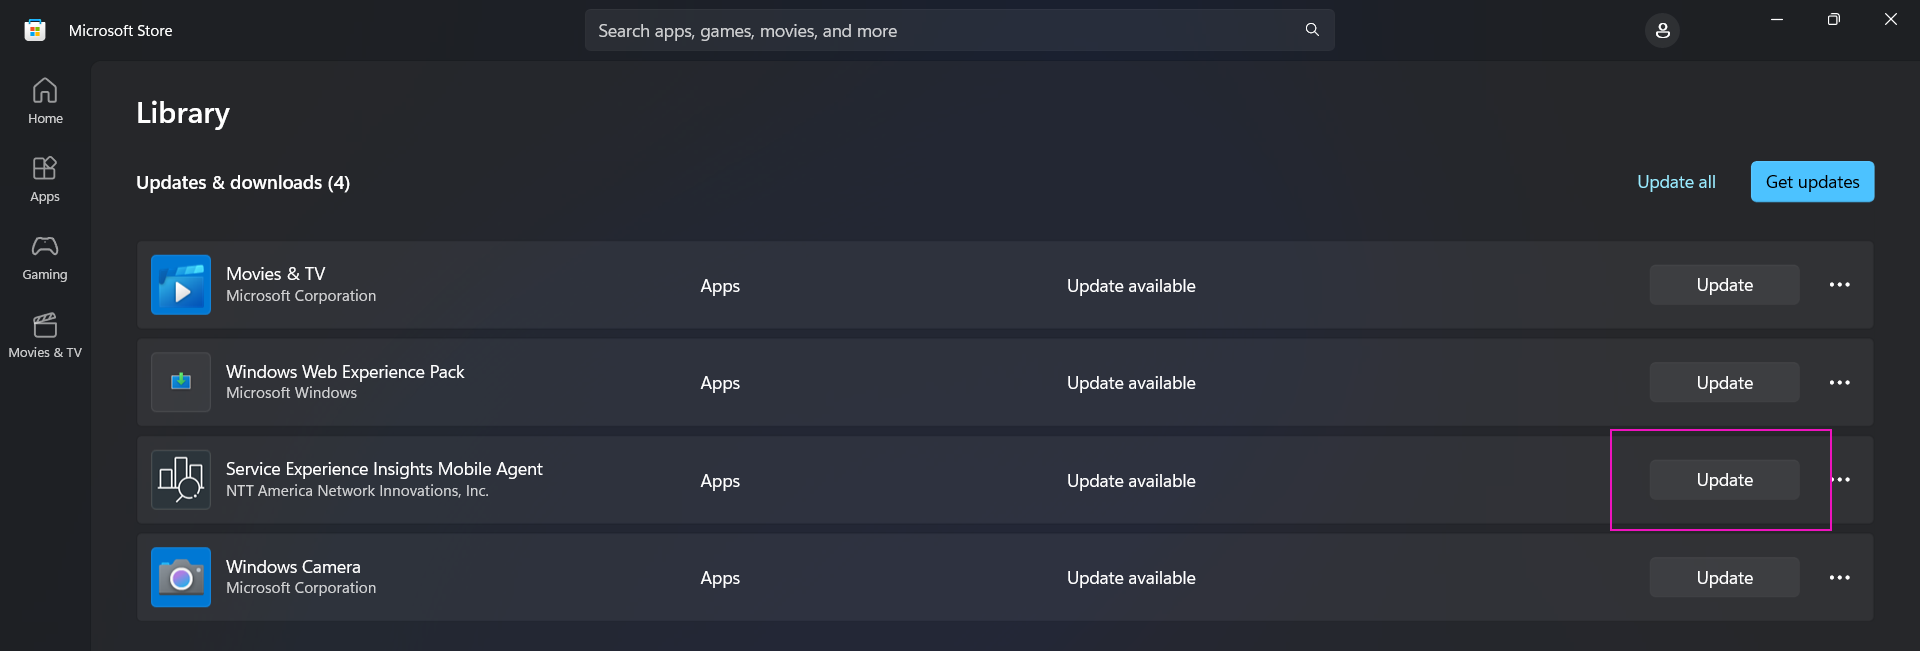
Mobile agents are updated on a continual basis. Updating installed agents to the latest version ensures optimal performance and access to the latest SEI features.
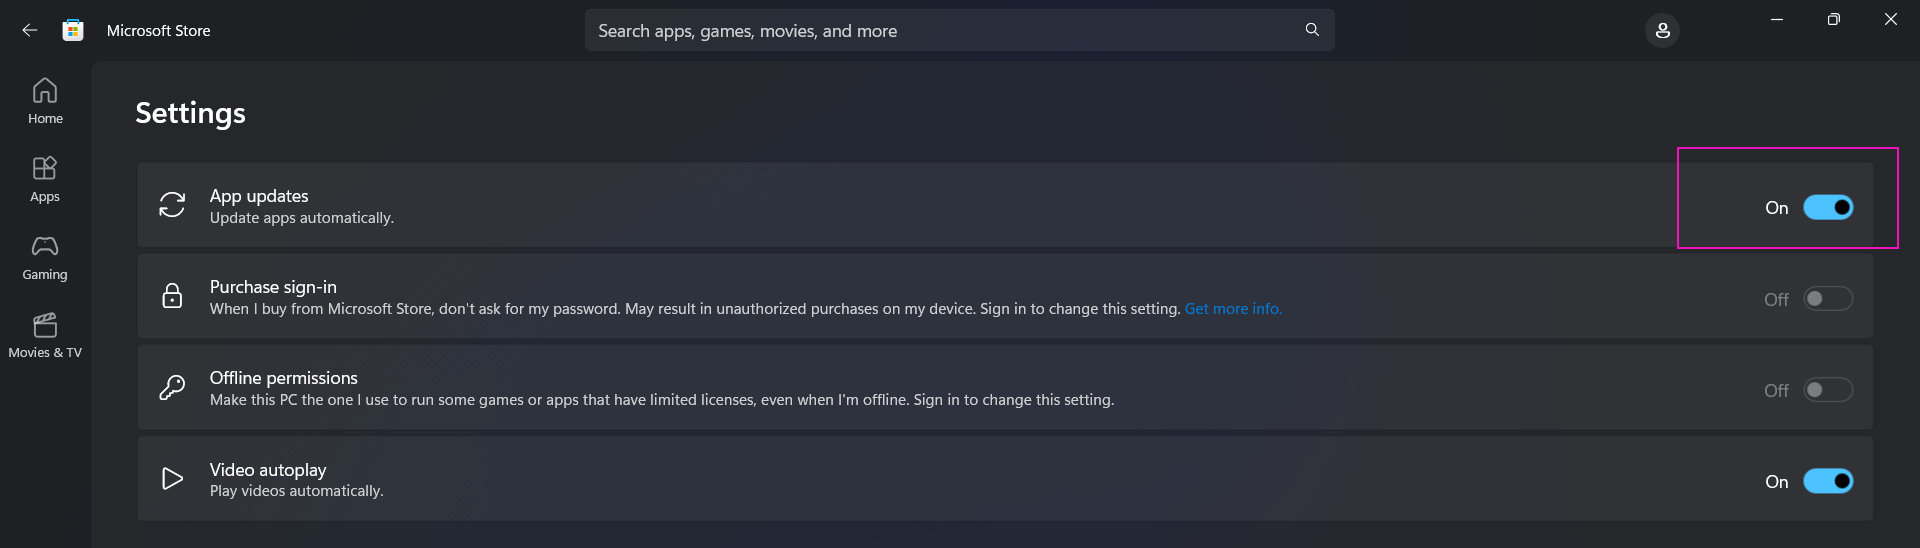
Typically, the update should be installed on your PC within a day after its release on the Microsoft Store.
Microsoft Store app, select Account > App settings
Microsoft Store app, select Library > Apps
Mobile Agent for macOS updates